
前言
最近一直覺得發文這件事有點耗時間,我這邊做一個 CI/CD 方式製作一個自動部屬機制,減少發一次文章之前都要輸入指令問題。
使用 Github Actions
一、創建 deploy Key
這邊要使用 deploy key之前,要利用 git 現有的功能 ssh-keygen 創建,建議要用名字來區別這是用於 deploy hexo。
1 | ssh-keygen -t rsa -b 4096 -C "your_email@example.com" |
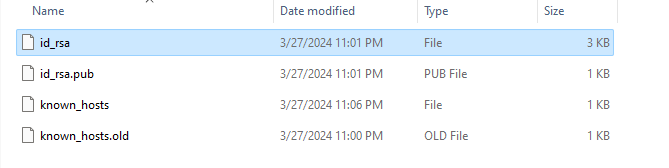
補充: ssh 區分
- 有 .pub 是公鑰
- 沒有副檔名是 私鑰
PS 若第一是使用 ssh-keygen 務必留意這個小東西只能用一次 repository ,如果你澳用在其他 repository 會被阻擋使用。
二、使用 Hexo Actions
這邊要使用的是官方提供的工具,這邊用現成說明。
這邊參數使用只需要修改兩個地方。
- _config.yml : 要設定 deploy 路徑,主要參考位置。
- github actions腳本 : 原則上只需要輸入 deploy key 就好,不需要加入其他內容。
參數
要瞭解這些輸入的更多資訊,請參閱 API Documentation
| Key | Required | Description | Default |
|---|---|---|---|
user_name |
NO | 部署時使用的 GitHub 帳戶使用者名稱。 | github-actions[bot] |
user_email |
NO | 部署時使用的 GitHub 帳戶使用者電子郵件。 | 41898282+github-actions[bot]@users.noreply.github.com1 |
deploy_key |
YES | 用於存取你的 GitHub Pages 儲存庫的Deploy Key。 | null |
commit_msg |
NO | 用於你的 GitHub Pages 儲存庫的 Git 提交訊息。 | null |
補充 : 官方提供 commit msg 預設輸入方式
github actions 有特別支援這種作法,可以抓取當初定義的 message 發行。
1 | github.event.head_commit.message |
三、設定 Github Actions 環境
本作者有分兩個路徑,兩這只要有一個設定錯 deploy key 會造成無法發布成功的尷尬問題。
- 寫部落格的 repository
- 存放 github pages 的 repository
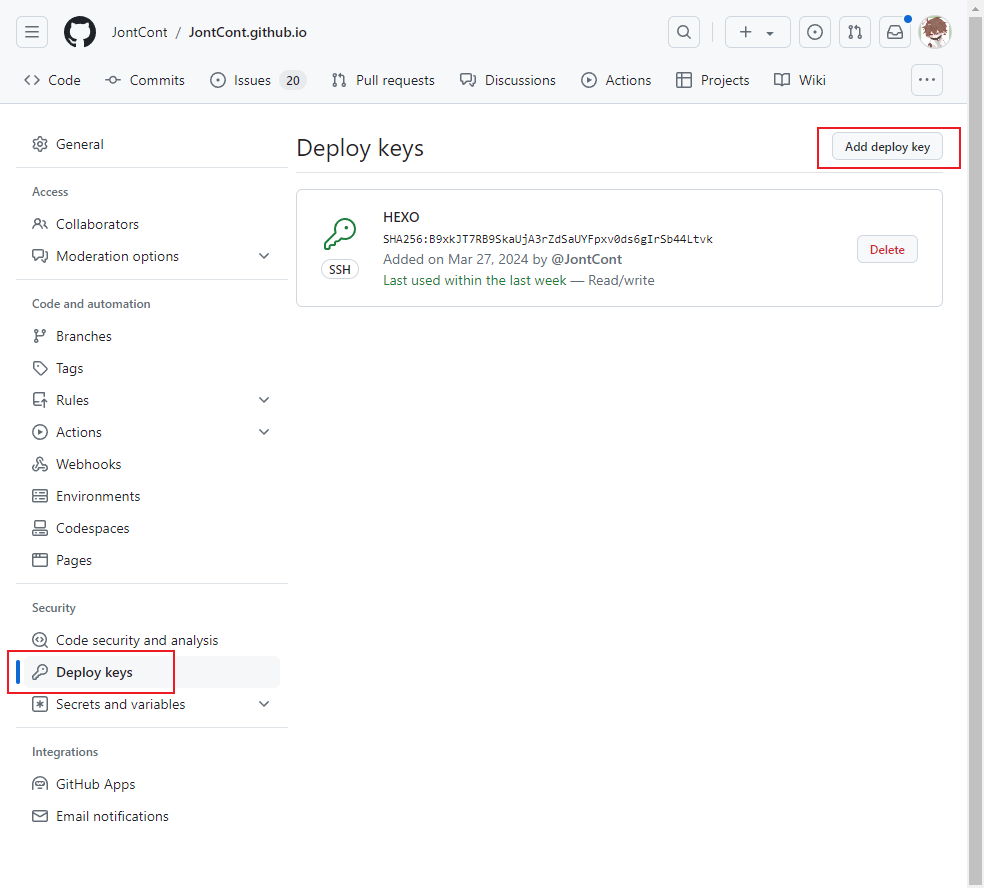
目前設定方式要用在存放 github pages 才可以有效發行成功, 使用記得要勾選 Allow write access 。
裡面輸入框請輸入公鑰並存檔即可,名字可以 _任意輸入_。

然後私鑰要用在 Actions secrets and variables > Repository secrets ,名字取名為 DEPLOY_KEY 。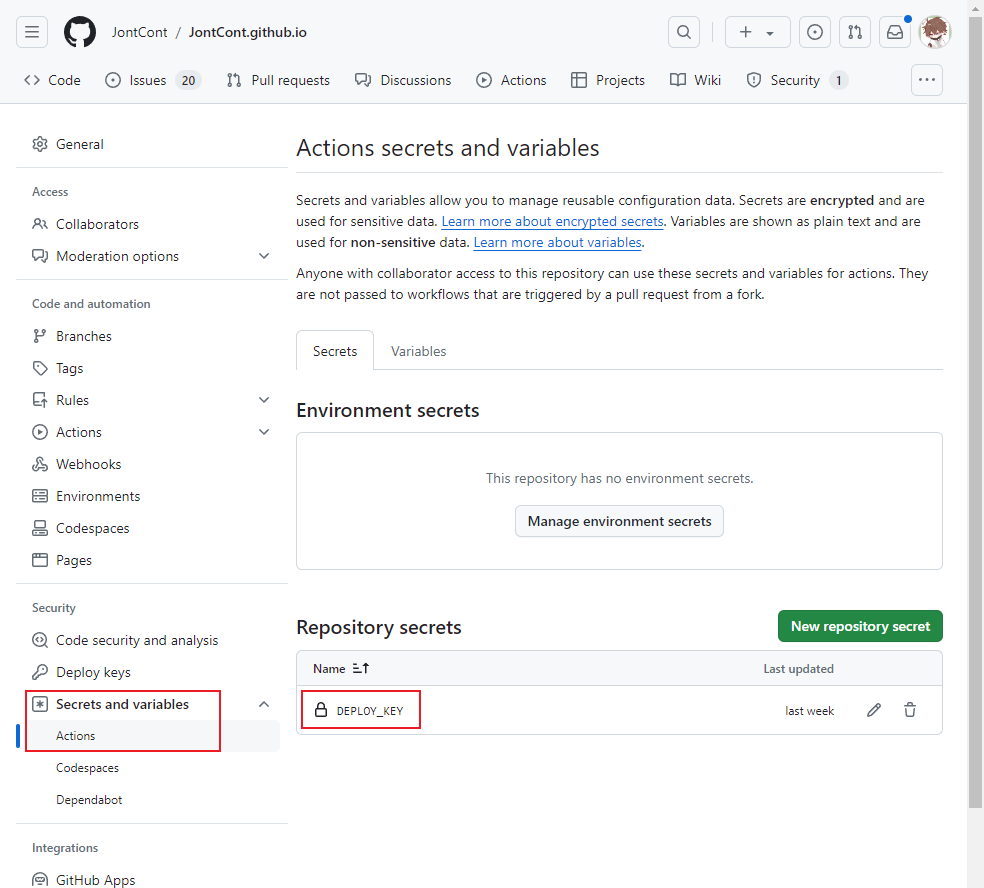
補充 : 存放原因
這個動作目前測試結果發現是發佈動作後會由一個動作要 push 到 github pages repository 上面,這段過程就需要使用 deploy key ,若沒使用就會在 Github Actions一直不斷輪迴失敗。
PS 如果要要使用 ssh 方式解決,我是沒有成功過若有興趣可以嘗試看看
四、設定 Github Actions 腳本
這邊我使用以下範本。原則上 sma11black 是可以成功發行,但是目前有在使用theme 且當初作者框架使用 stylus 寫前端會有跑板問題,建議使用 marsen/hexo-action@v1.0.7 這個作者是將最新的 node 加入在這個版本,目前只有他的可以到 1.0.7。
1 | name: Hexo 自動發行 |
補充 : 區域時間
先前有另外爬文設定時區作法可以設定參數,這樣就不會去抓預設地區時間。
1 | env: |
使用 butterfly 須知
如果要使用 actions 且又使用 butterfly 務必要看這段內容,否則又會在卡關一次。因為作者是使用 ruby 撰寫前端,所以要用hexo 要記得下以下內容
1 | npm install hexo-renderer-pug hexo-renderer-stylus --save |
主要原因是當發行時候會出現 extends includes/layout.pug block content include ./includes/mixins/post-ui.pug #recent-posts.recent-posts +postUI include includes/pagination.pug,這時候記得使用這兩個語法就可以解決。
結論
這段是我花最久時間寫一篇文章,主要原因是不看任何資訊猛幹狂幹,幹不出來跑去爬文看來我又要重新學習一次 github actions。


![[Github Pages] 如何建立多個專案網站](/image/20250315_20-53-42.png)


![[Benchmarks] Database Connect 效能差異](/image/20250318_23-37-06.png)